
[49. Pickups #2]
Item에 파티클을 적용시켜 본다.
// Item.h
public:
    UPROPERTY(VisibleAnywhere, BlueprintReadWrite, Category = "Item | Mesh")
    UStaticMeshComponent* Mesh;

    UPROPERTY(EditAnywhere, BlueprintReadWrite, Category = "Item | Particles")
    class UParticleSystemComponent* IdleParticlesComponent;

// Item.cpp
#include "Particles/ParticleSystemComponent.h"

AItem::AItem()
{
    Mesh = CreateDefaultSubobject<UStaticMeshComponent>(TEXT("Mesh"));
    Mesh->SetupAttachment(GetRootComponent());

    IdleParticlesComponent = CreateDefaultSubobject<UParticleSystemComponent>(TEXT("IdleParticlesComponent"));
    IdleParticlesComponent->SetupAttachment(GetRootComponent());
}
시각적으로 보이는 오브젝트와 파티클을 출력해야 하므로 Item 클래스에 메시와 파티클을 추가해준다.
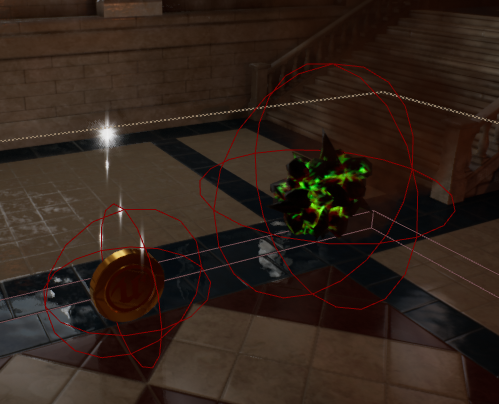
파티클과 메시를 적당히 선택해주면 비주얼적으로 매우 괜찮게 보여진다.
좀 더 괜찮게 보이기 위해 해당 오브젝트와 겹침 이벤트 발생시 파티클을 하나 생성하고 오브젝트를 삭제해보자.
// Item.h
public:
    UPROPERTY(EditAnywhere, BlueprintReadWrite, Category = "Item | Particles")
    class UParticleSystem* OverlapParticles;

// Item.cpp
#include "Kismet/GameplayStatics.h"

void AItem::OnOverlapBegin(UPrimitiveComponent* OverlappedComponent, AActor* OtherActor, UPrimitiveComponent* OtherComp, int32 OtherBodyIndex, bool bFromSweep, const FHitResult& SweepResult)
{
    UE_LOG(LogTemp, Warning, TEXT("Super::OnOverlapBegin()"));

    if (OverlapParticles)
    {
        UGameplayStatics::SpawnEmitterAtLocation(GetWorld(), OverlapParticles, GetActorLocation(), FRotator(0.f), true);
    }
    Destroy();
}

코드에서 파티클을 따로 정하지 않았으므로 블루프린트에서 선택해주면 된다.
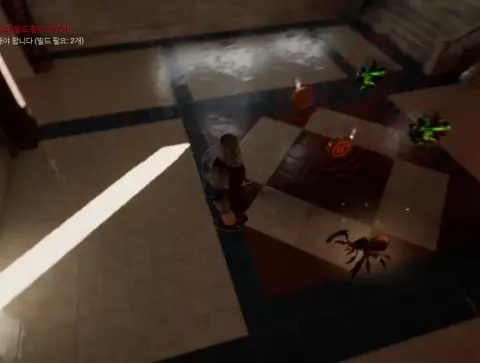
잘 적용되었다.
// Item.h
public:
    UPROPERTY(EditAnywhere, BlueprintReadWrite, Category = "Item | Sounds")
    class USoundCue* OverlapSound;

// Item.cpp
#include "Sound/SoundCue.h"

void AItem::OnOverlapBegin(UPrimitiveComponent* OverlappedComponent, AActor* OtherActor, UPrimitiveComponent* OtherComp, int32 OtherBodyIndex, bool bFromSweep, const FHitResult& SweepResult)
{
    UE_LOG(LogTemp, Warning, TEXT("Super::OnOverlapBegin()"));

    if (OverlapParticles)
    {
        UGameplayStatics::SpawnEmitterAtLocation(GetWorld(), OverlapParticles, GetActorLocation(), FRotator(0.f), true);
    }
    if (OverlapSound)
    {
        UGameplayStatics::PlaySound2D(this, OverlapSound);
    }
    Destroy();
}
효과음도 마찬가지로 블루프린트에서 선택해주고 실행하면 효과음까지 같이 재생된다.
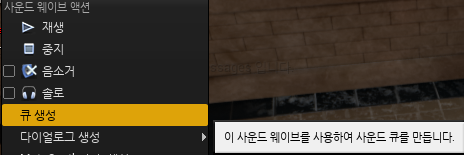
SoundCue를 이용하기 때문에 wav 파일로 사운드 큐를 만들어서 사용해야 한다.
[50. Pickups #3]
// Item.h
public:
    UPROPERTY(EditAnywhere, BlueprintReadWrite, Category = "Item | ItemProperties")
    bool bRotate;

    UPROPERTY(EditAnywhere, BlueprintReadWrite, Category = "Item | ItemProperties")
    float RotationRate;

// Item.cpp
void AItem::Tick(float DeltaTime)
{
    Super::Tick(DeltaTime);

    if (bRotate)
    {
        FRotator Rotation = GetActorRotation();
        Rotation.Yaw += DeltaTime * RotationRate;
        SetActorRotation(Rotation);
    }
}
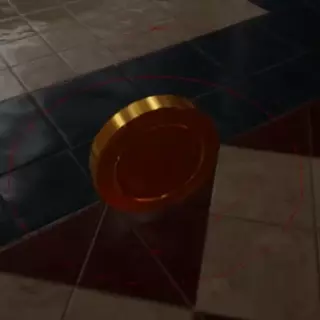
코드나 에디터의 디테일 탭에서 true로 만들면 천천히 회전하게 된다.
[정리]
- ParticleSystemComponent는 컴포넌트이고 ParticleSystem은 파티클 효과 그 자체이다. 그래서 전자는 CreateDefaultSubobject에 의한 생성이 필요하고 후자는 필요하지 않다.
파티클 지속의 필요성 / 일회성 정도로 판단하면 괜찮지 않을까 싶다. - Destroy()는 유니티의 Destroy()와 유사하다.
'언리얼 엔진 > UE4 C++' 카테고리의 다른 글
| [UE C++] Gameplay Mechanics #6 (0) | 2022.09.09 |
|---|---|
| [UE C++] Gameplay Mechanics #5 (0) | 2022.09.08 |
| [UE C++] Gameplay Mechanics #3 (0) | 2022.09.07 |
| [UE C++] Gameplay Mechanics #2 (0) | 2022.09.07 |
| [UE C++] Gameplay Mechanics #1 (0) | 2022.09.06 |